How to Build a Fence in Seattle
A Seattle-specific guide to building a fence — permits, 811, post setting, cedar that survives rain, and when to hire a fence builder.

How to Build a Fence in Seattle
Most “how to build a fence” guides assume dry ground, flat suburbs, and simple height rules. In Seattle and the Eastside, you’re dealing with rain, wet clay, hills, tight lots, moss, and some very specific fence regulations — so the process and the risk look different here.
You can tackle a small, straightforward fence yourself. But if you’re looking at a privacy fence on a slope, a corner lot, or a shared property line, that’s where calling a Seattle fence builder like Fence Genius saves you a lot of weekends.

Before you build: Seattle rules that change the plan
Before you buy a single post, confirm what Seattle will allow on your lot.
Seattle Department of Construction & Inspections (SDCI) does not require a permit if your fence is 8 feet or shorter and does not include masonry or concrete elements taller than 6 feet. You will need a construction permit if the fence is in a flood-prone area, or if it exceeds those basic limits. Taller fences typically need a construction permit, often subject-to-field-inspection. Confirm the current rules on SDCI’s fences page.
In neighborhood residential and multifamily zones, fence height is generally limited to 6 feet, plus up to 2 feet of architectural features such as arbors or trellises. That’s why you see 6-foot privacy fences with lattice or an arbor on top — the fence itself is still 6 feet.
Front yards and street-side setbacks are tighter. In those areas, height is typically limited to 4 feet. On corner lots in Ballard, West Seattle, or Kirkland, that surprise catches a lot of homeowners who wanted full privacy facing the street.
Slopes add another wrinkle. On a sloping site, the city allows the fence to be 8 feet high as long as the average height between posts is 6 feet. That’s how a stepped or racked fence can follow a hill without violating height rules — but the layout has to be right.
Retaining walls change the math:
- If the wall is used to raise the grade, fence plus wall is limited to 9 feet 6 inches total.
- If the wall is used to lower the grade, normal fence height limits apply, measured from the finished lower grade.
Fences and gates generally cannot restrict access to a street or alley from commercial or multifamily building exits. Properties in environmentally critical areas — wetlands, steep slopes, and similar zones — have a different set of restrictions. Don’t assume you can dig the same way you would on a standard lot.
If that already feels like a lot, a local fence builder can help you design something that fits your goals and stays inside the rules. We walk through permits and zoning on many projects, especially corner lots and hillside privacy fences. Start with our overview at /blog/seattle-fence-permits-regulations, or send a note at /contact.
Choose a fence style that survives Puget Sound weather
Once you know what you’re allowed to build, choose something you can live with through Seattle winters — not just something that looks good on a dry August afternoon.
Around Puget Sound, you’re balancing privacy, durability, and constant moisture.
- Solid board — Classic vertical cedar privacy. A workhorse for backyards in Rainier Valley, Shoreline, and Bellevue.
- Picture-frame — Horizontal rails and trim around the board field, with a finished look on both sides. Top caps shield raw board ends from rain, which is a real durability upgrade here.
- Horizontal — Clean and modern on newer builds in Ballard, Queen Anne, and Redmond. Wet boards can sag if spacing and support aren’t dialed in.
- Craftsman — Privacy panels with top caps, trim, and accent details. Those caps aren’t just decorative — they keep board tops from soaking all winter.
- Picket — Often 3–4 feet, a better fit for front yards in Green Lake, Capitol Hill, and older Kirkland blocks where full privacy isn’t allowed. Keep pickets off mossy soil.
Material choice matters as much as style:
- Pressure-treated posts (ground-contact rated) with Western red cedar rails and boards are the PNW standard. That combo handles wet soil, humidity, and freeze-thaw better than untreated lumber.
- Use stainless steel or hot-dipped galvanized fasteners with cedar. Electroplated “zinc” screws rust quickly in Seattle rain and stain the wood.
- Cedar vs vinyl: cedar looks more at home on Seattle houses and is easier to repair board by board. Vinyl avoids rot, but it can look out of place on older homes and still depends on a solid structure underneath. For more on climate and materials, see /blog/seattle-weather-fence-durability.
When you’re unsure, look at what’s actually surviving in your neighborhood after years of rain. That tells you more than any national “top styles” list. Browse local options on /fence-styles.

Tools and materials for a Seattle fence build
You don’t need a full contractor setup, but Seattle soil and slopes mean you do need the right basics.
Typical tools:
- Post hole digger and/or an auger
- Shovels, wheelbarrow, and stakes
- 4-foot level, line level, and string line
- Tape measure and marking paint
- Circular saw or miter saw
- Drill/driver, impact driver, hammer, and framing square
- Clamps (especially for gates and picture-frame details)
Typical materials:
- Ground-contact pressure-treated posts
- Western red cedar rails and boards
- Concrete mix for setting posts
- Clean gravel for drainage at the bottom of holes
- Stainless or hot-dipped galvanized screws and nails
- Gate hardware (hinges, latch, and a gate kit or diagonal bracing)
- Wood top caps or metal post caps, depending on style
Wet clay is heavy and sticks to everything, so tarps and plywood for staging help. On a steep Madrona or Somerset hillside, think through how you’ll move concrete and posts safely.
If you’d rather skip the tool run and go straight to a finished fence, get a quote from our in-house crews at /quote or call (253) 766-5854. Eric and Andrew Knudsen built Fence Genius to handle these local conditions with in-house crews, not subcontractors.
Layout: property lines, utilities, and post spacing
Layout is where you decide where the fence goes — and it’s the step that keeps you out of neighbor disputes and utility trouble.
Confirm property lines and neighbors
Don’t guess based on an old fence that might already be in the wrong place. Check your survey from closing, look for pins if they’re still visible, and hire a surveyor if the line is fuzzy.
If you’re building on a shared line, talk to your neighbor first. You don’t need a formal agreement for every project, but a quick conversation avoids a lot of drama in close-packed Seattle neighborhoods.
Call 811 before you dig
Washington treats fence post holes as excavation. Before you dig, follow Washington 811 and RCW 19.122.030.
In practice:
- Mark your planned fence line in white (paint or pin flags) before you notify 811.
- Call 811 or submit online at callbeforeyoudig.org.
- Notify at least 2 full business days and not more than 10 full business days before your planned start date. Business days exclude Saturday, Sunday, and legal holidays.
- Don’t dig until known facility operators have marked their locatable underground facilities.
- As of January 1, 2026, you also must receive a positive response from all operators with underground facilities in your notice area before digging. That’s more than paint — it’s confirmation they’ve responded.
- Locate marks are typically good for about 45 days. Recertify if the job runs longer.
- Public locates do not mark private lines — irrigation, landscape lighting, private electric to a shop, septic, and similar. Those stay your problem.
The Washington UTC Call Before You Dig overview is a clear summary of the process. This isn’t red tape. Hit a gas line in West Seattle clay and your weekend project becomes an emergency.
Plan post spacing
Typical residential spacing is 6–8 feet on center, depending on height, wind, soil, and whether you’re hanging gates. On slopes, spacing often gets tighter so each section stays manageable. On windy ridges — Queen Anne, Newcastle — tighter spacing helps the fence stay plumb.
Use string lines and stakes. Measure from a known starting point and mark every post center before you dig. This is also when you check that the layout still complies with height rules on slopes and setbacks.
Dig holes and set posts (the step that makes or breaks the fence)
If you hear one thing from a Seattle fence builder, hear this: posts are the make-or-break step. Almost every DIY fence we get called back to fix traces to holes and setting.
How deep to dig in Seattle soil
This is construction best practice, not city code: post holes are commonly about one-third of the above-grade fence height, plus a few inches of gravel at the bottom for drainage.
For a 6-foot fence, that commonly means about 24–30 inches of hole depth, adjusted for soil. Seattle doesn’t have Midwest frost depth, but we do have wet clay that moves, occasional freeze-thaw, and slopes where water runs through the soil. You’re digging to get below the “wiggle zone” so the fence doesn’t lean after the first wet winter.
Gravel and concrete
Add a few inches of clean gravel at the bottom of each hole so water has somewhere to go besides sitting under the post.
Then:
- Use fresh mix — not mystery bags from a decade ago.
- Set the post, check plumb, and brace it.
- Fill with concrete and crown or dome the top so water sheds away from the wood. Do not leave a flat birdbath against the post.
In our climate, that crowned detail matters. Flat concrete holds water, grows moss, and rots posts at ground level.
Let concrete cure before you hang heavy panels. Typical guidance is 24–72 hours, depending on mix and weather. In cool, rainy Seattle weather, lean toward the longer side — especially for gates.
Slopes, tight lots, and access
On a steep slope in Leschi or Issaquah, you’re often stepping or racking the fence to follow grade. Think about hole depth on the downhill side, how each section transitions without big gaps, and whether you can safely work with concrete on a hillside.
In tight lots — Capitol Hill, Fremont, old Ballard — you’re close to neighboring structures and existing utilities. Careful layout beats a rushed auger.
If this step feels like more than you want, it’s the best place to hand the job off. Our in-house teams at Fence Genius build these conditions every week.
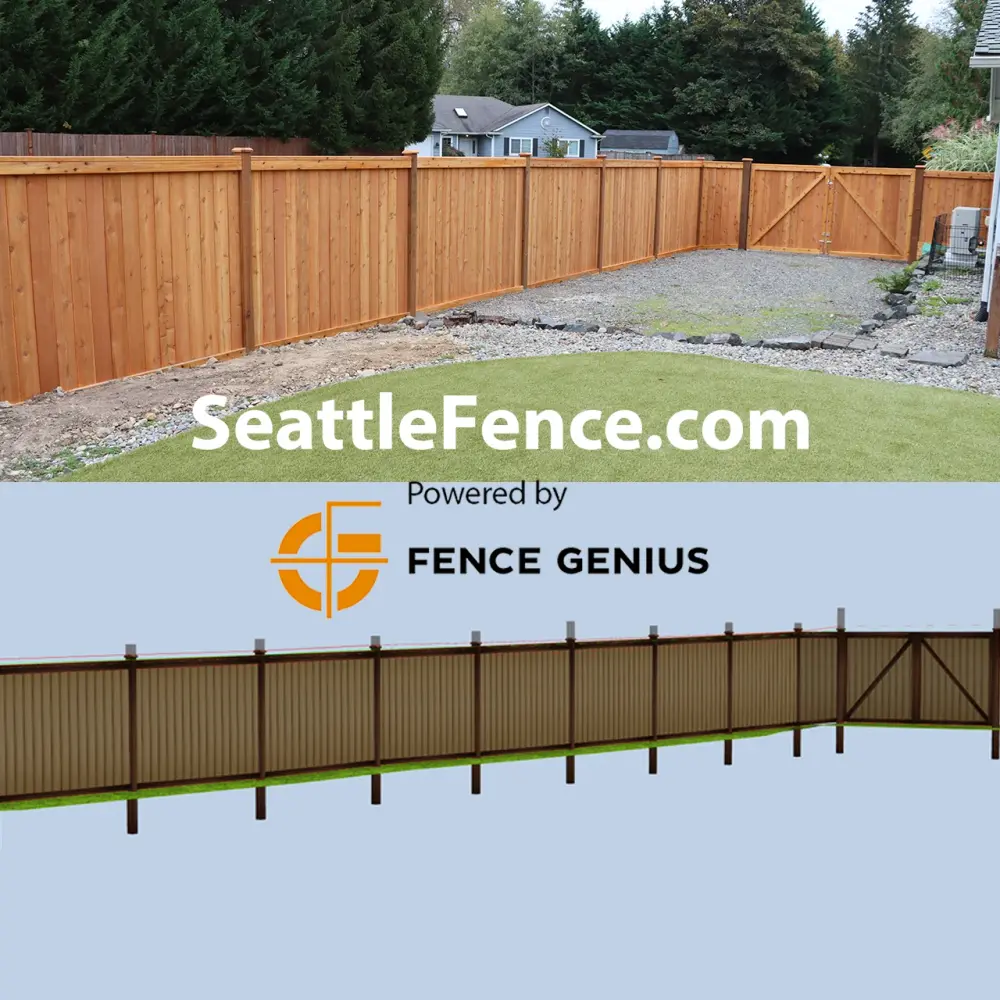
Rails, boards, and gates
Once posts are solid and cured, the rest feels more like carpentry — but rain and wind still matter.
Rails and boards
Rails tie the fence together. With cedar rails on treated posts:
- Use two or three rails depending on height and style.
- Keep wood off the ground. Don’t run rails or boards into soil or standing water.
- Leave a small gap at the bottom of the boards so splashback, soil, and moss don’t rot the bottoms. That’s non-negotiable here.
Install boards to match the style — tight vertical boards for privacy, a framed field for picture-frame, careful spacing for horizontal, and a top cap on craftsman work so board tops don’t sit open to rain.
Use stainless or hot-dipped galvanized fasteners. Cheap hardware saves a few dollars at checkout and stains cedar by the first winter.
Gates that don’t sag
Gates are usually where DIY builds reveal themselves. A gate that lasts in this climate needs:
- Extra posts — often larger or closer together than line posts
- Diagonal bracing or a quality gate kit to keep the frame square
- Hardware rated for wet outdoor use, ideally stainless or high-quality galvanized
Leave clearance at the bottom so the gate doesn’t drag when soil swells or moss builds up. If you’ve never hung a gate, this is a very normal “call in a pro” moment. A sagging gate is what you’ll curse every day — not a slightly crooked board in the back corner.
Finish, drainage, and first-year maintenance
Seattle doesn’t bake fences in sun. It soaks them, grows moss, and moves soil underneath. The first year tells you whether the build will last.
Cedar doesn’t need a finish to survive here, but a quality penetrating stain or sealer can slow UV graying and moisture cycling. Avoid thick film finishes that peel when boards swell and shrink. Let the fence dry before you coat it — installing in a November rain and staining the next day is a wasted can of product.
After you build:
- Don’t let soil slope toward posts. Regrade so water drains away.
- Keep mulch and planting beds a little back from the fence line, especially in shade.
- On slopes, watch the first big rain and fix pooling at posts.
In the first wet season, check for posts that start to lean, early fastener corrosion, and plants trapping moisture against the boards. North-facing fences in shade are classic moss collectors.
Common Seattle DIY mistakes
After years as a Seattle fence builder, we see the same issues over and over:
- Shallow post holes in clay — feels solid in August, leans after the first winter.
- Flat concrete around posts — a water bowl that rots the post at grade.
- No bottom gap on boards — boards wick water, grow moss, and rot in Green Lake shade or Sammamish woods.
- Skipping 811 — illegal, dangerous, and expensive when you hit a service line.
- Ignoring height and setback rules — full privacy in a front setback, or overshooting height on a raised retaining wall, then dealing with SDCI.
- Underbuilt gates — heavy privacy gates on undersized posts with light hinges and no brace.
- Wrong fasteners — electroplated screws that rust and streak cedar.
If your project has several of these risk factors — slope, clay, front setback, heavy gates — talk to a pro before you dig. Our /blog/seattle-fence-builder-checklist walks through what to ask when you’re evaluating a fence builder.
DIY vs hiring a Seattle fence builder
You don’t have to hire a pro for every fence.
DIY is usually realistic when the run is short, mostly straight, and on reasonably level ground; you’re in a backyard away from street setbacks; and you’re comfortable with basic carpentry over multiple weekends. A small, level cedar fence in a typical Beacon Hill or Bellevue backyard can be a satisfying project. We unpack the tradeoffs in /blog/diy-vs-hiring-fence-builder-seattle.
Hiring a Seattle fence builder makes more sense when the fence runs on a slope; you’re near a retaining wall, flood-prone area, or critical area; the design includes gates, picture-frame panels, or craftsman details; you’re on a corner lot with front/side setbacks; or you’re sharing boundaries and want it done once, correctly.
At SeattleFence.com, our crews are in-house, not subcontractors. If you want a realistic professional timeline, see /blog/fence-builder-timeline-seattle-install, then compare that to how many personal weekends you’re willing to give this project.
Frequently asked questions
Do I need a permit to build a fence in Seattle?
Often no — if the fence is 8 feet or less and doesn’t have masonry or concrete elements over 6 feet. You do need a construction permit in a flood-prone area, or if you’re building taller. Front setbacks, slopes, and retaining walls add extra rules. Confirm on SDCI’s fences page or read /blog/seattle-fence-permits-regulations.
How deep should fence posts be in Seattle?
Best practice (not city code) is about one-third of the above-grade height, plus gravel at the bottom. For a 6-foot fence, that’s commonly around 24–30 inches, adjusted for soil. On slopes or very soft clay, deeper holes and tighter spacing help.
Do I really have to call 811 before digging?
Yes. Washington law requires it. Mark the line in white first, notify at least 2 business days and not more than 10 before you dig, wait for locates, and — as of 2026 — wait for positive response from all operators. Public locates will not mark private irrigation or landscape lighting.
How long does a DIY fence take?
A handy homeowner can finish a short, level backyard fence in a couple of focused weekends with help. Slopes, gates, retaining walls, and rain stretch that into several weekends or more. Our crews work full-time and still plan around weather.
Is cedar better than vinyl in Seattle?
For most Seattle and Eastside homes, Western red cedar on treated posts is the better fit. It looks natural, handles our climate when built correctly, and is easier to repair. Vinyl avoids rot but is less forgiving of ground movement and often looks wrong on older Seattle houses.
What if my neighbor and I disagree about the fence location?
Start with the survey and any visible pins, then talk it through. If you still disagree, a professional survey is the cleanest answer. You can also build just inside your property if you don’t want a shared fence. When we handle shared-line projects, we confirm the line before we set a single post.
How much does a professionally built fence cost in Seattle?
It depends on length, height, style, material, gates, slope, and access. Generic online numbers are usually misleading. Request a tailored estimate at /quote or call (253) 766-5854.
Ready to skip the weekends and get it built right?
You can build your own fence in Seattle. With the right layout, post depth, drainage, and materials, a small backyard run is a doable project. Our rain, clay, hills, and fence rules just make it a different job than most generic guides describe.
If you’d rather spend weekends in the yard instead of in the clay, our in-house crews at SeattleFence.com can take it from first stake to final gate. Start with a free quote at /quote, send a note at /contact, or call (253) 766-5854 and talk through the project with a Seattle fence builder who does this on real Puget Sound soil.